# Multiple Arduino board
The library can run on multiple Arduino Board with only one Ethernet Shield and others boards connect by I2C protocol. The main board (with Ethernet shield) aka "master" received data and send command to X-Plane, the other board, aka "slave" are uses only to read/write on input/output PIN.
All the controls/commands registration are made on the master board. There is no input/output configuration on slave board, you only need to run the SlaveBoardApplication application.
For more information about how Master/Slave communication work, you can read Arduino "Master Writer/Slave Receiver (opens new window)" page.
# Active multiple board mode
To active multiple board support you need to enable ACTIVE_MULTI_ARDUINO_BOARD_MODE parameter when you compile the library.
Please see configuration reference page for more information.
# Declare controls on slave board
To declare control on slave board, you have to passed an additional parameter has last parameter of control's constructor. This parameter is the address of Slave Arduino board on I2C bus.
For example, to declare a LED control on PIN n°8 of Slave board n°1, just add board address as last parameter, like this : new ArduinoLEDControl(8, 1).
# Arduino connection
| Board view | Sketch view |
|---|---|
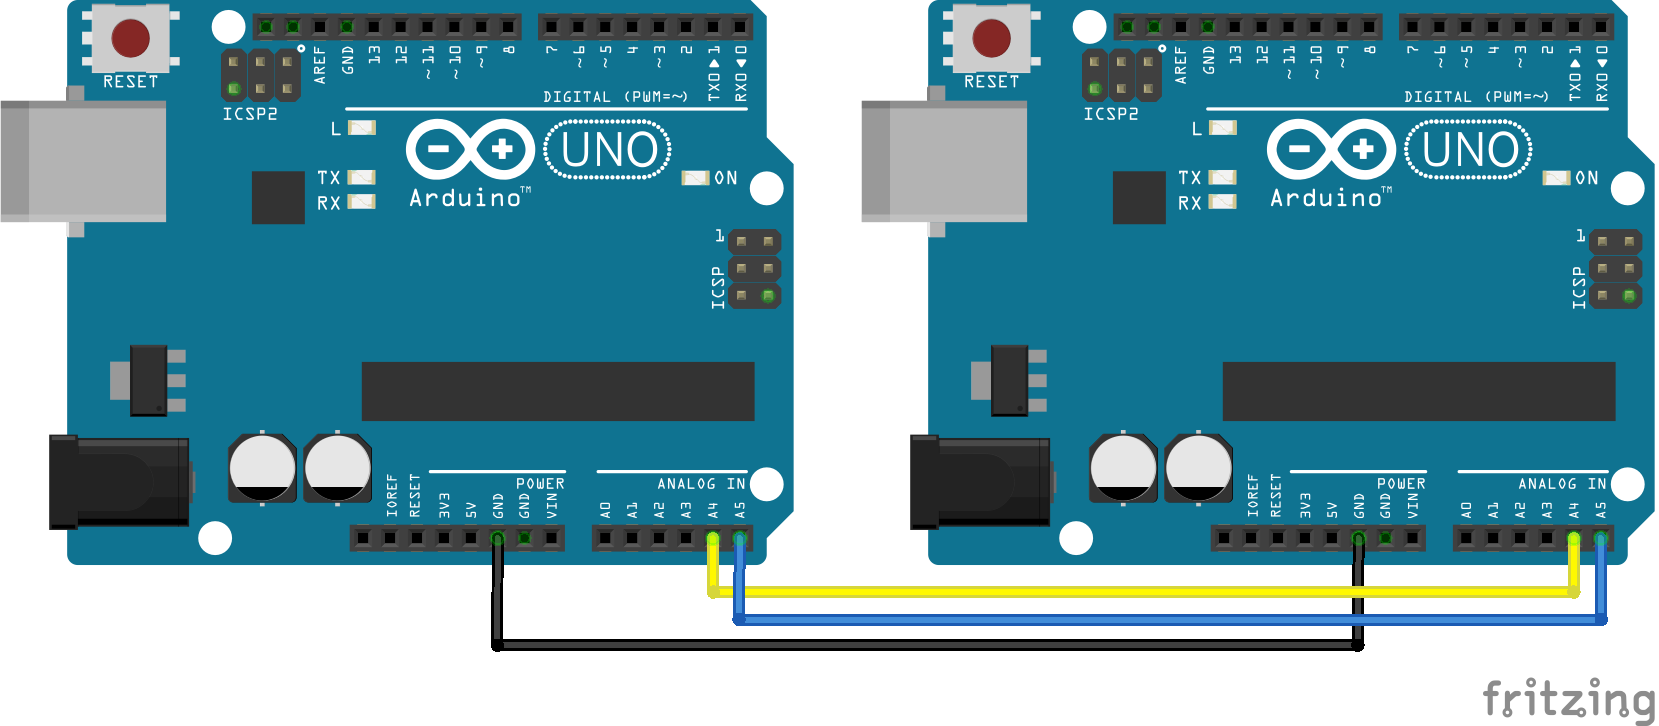 | 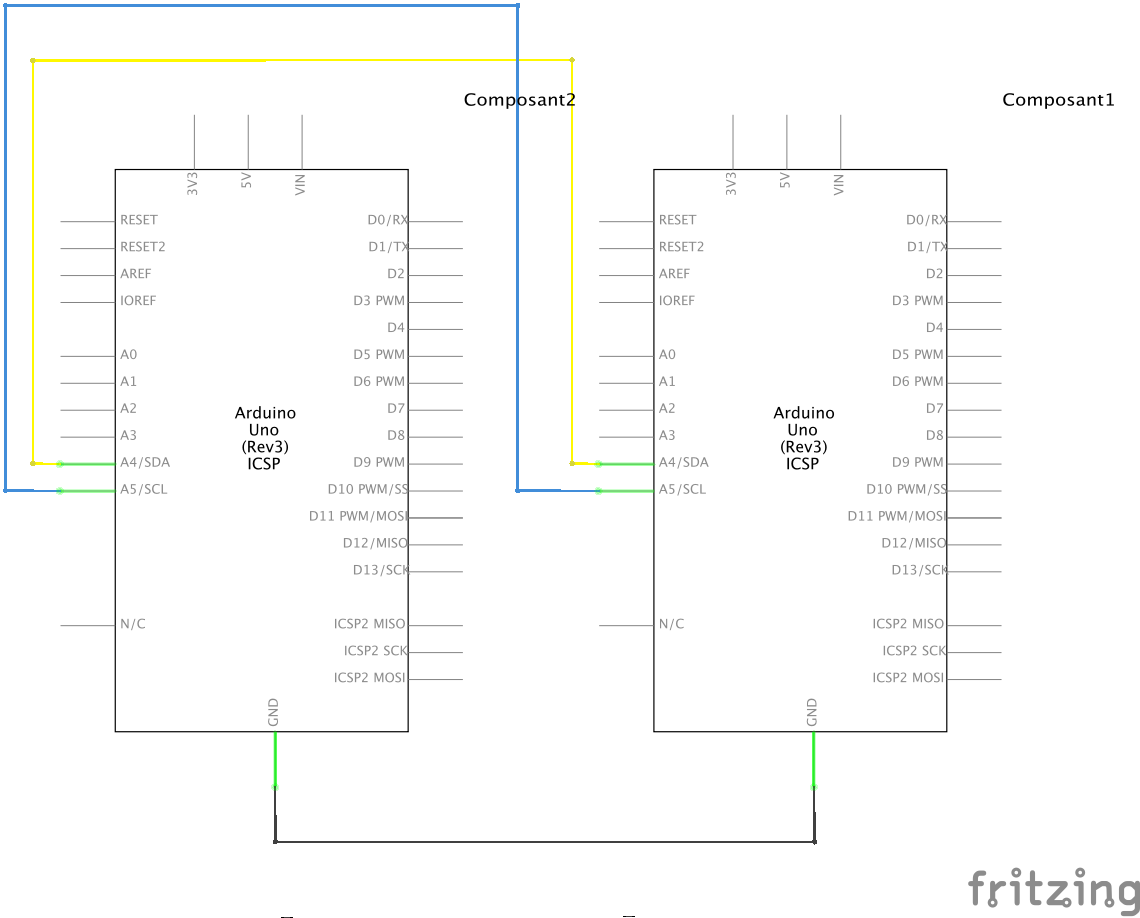 |
# Code sample "Master Board"
#include <Arduino.h>

#include "src/RomgereCockpit/Application/CockpitMainApplication.h"
#include "src/RomgereCockpit/CommunicationInterface/EthernetInterface.h"
#include "src/RomgereCockpit/ArduinoControl/ArduinoToggleSwitchControl.h"
#include "src/RomgereCockpit/ArduinoControl/ArduinoLEDControl.h"
#include "src/RomgereCockpit/ArduinoControl/ArduinoPushButtonControl.h"

CockpitMainApplication  *cockpitApp;
EthernetInterface       *ethernetInterface;

void setup()
{
  //Create & start Ethernet interface + Create app with our Ethernet interface
  byte arduinoMAC[6]  = { 0xDE, 0xAD, 0xBE, 0xEF, 0xEA, 0xED };
  ethernetInterface = new EthernetInterface( 49001, 49000, { 192, 168, 1, 97 }, arduinoMAC, { 192, 168, 1, 21 });
  cockpitApp = new CockpitMainApplication( ethernetInterface);

  //Declare and bind control - MASTER BOARD
  cockpitApp->RegisterInputControl(
    new ArduinoPushButtonControl(8), //Create push button on PIN 8 on Master board
    new XPlaneSimpleCommand("sim/annunciator/test_all_annunciators") //Send "Test all annunciators" command to X-Plane
  );

  //Declare and bind control - SLAVE BOARD
  cockpitApp->RegisterOutputControl(
    new ArduinoLEDControl(8, 1), //Create LED Control on PIN n°8 on Slave board n°1
    new XPlaneInputData(67, 0)
  );

  //Declare and bind control - SLAVE BOARD
  cockpitApp->RegisterInputControl(
    new ArduinoToggleSwitchControl(9, 1), //Create toggle switch Control on PIN n°9 on Slave board n°1
    new XPlaneSimpleCommand("sim/systems/avionics_on"),
    new XPlaneSimpleCommand("sim/systems/avionics_off")
  );
}

void loop()
{
  cockpitApp->Loop();
}
This sample come from Master.ino (opens new window) file
# Code sample "Slave Board"
#include <Arduino.h>
#include "src/RomgereCockpit/Application/SlaveBoardApplication.h"

SlaveBoardApplication* slaveCockpit;

void setup()
{
  slaveCockpit = new SlaveBoardApplication(1); //Declare our application on address 1
  slaveCockpit->RegisterI2C(); //Register board on I2C bus
}

void loop()
{
	delay(100);
	slaveCockpit->loop();
}
This sample come from Slave.ino (opens new window) file